The following guide explains step by step how to upload a News Article or Press Release. The process is very similar for both.
Top Tip: It’s easier to select and upload your image to Umbraco Media library first before inserting your copy.
How to insert your image
Go to Asset Bank, select your image and save it to your PC.
NB: The Compassion website always needs fresh content and images. Please make sure that where possible, new images are chosen each time and check the website first to avoid duplicating images.
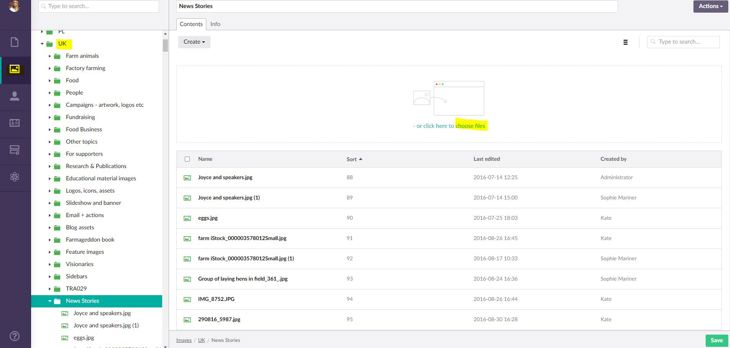
- Click on the media icon highlighted in the screenshot below
- Click on UK folder
- Scroll down to News Stories
- Choose file and find your chosen image on your PC
- Add alt text to the image once selected from the list
- Click save
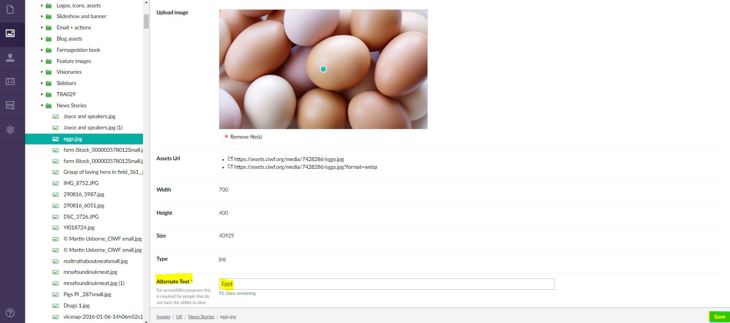
Now that you have saved your image, you can start working on your Content.
How to upload Your Content
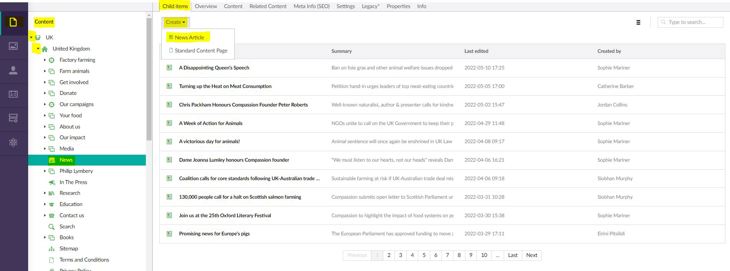
- Go to Content
- Click on arrow next to UK
- Click on arrow next to country United Kingdom
- Scroll down to 'News'
- On Child Items tab click 'Create' then 'News Article'
Open webnews copy in word document template.
Locate the title from the briefing document. If it's written in all caps convert to sentence case. Copy the Title from the Word document and paste as plain text into the following:
- Overview tab (Top Header)
- Content tab (Title)
- Meta Info tab (Meta Title)
NB. It’s really important to paste as plain text throughout as otherwise formatting can be carried over which you don’t want on your page.

Copy Summary from the word document and paste into:
- Content tab ( Summary)
- Content tab (Meta Description)
Insert the release date
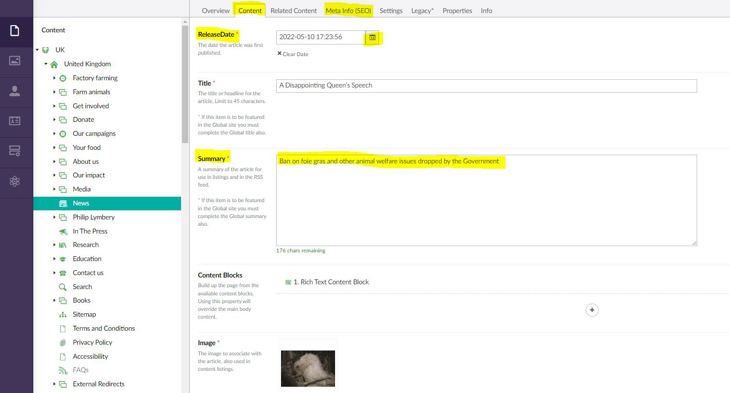
On the Content tab, scroll down to Content Block and click on add content.
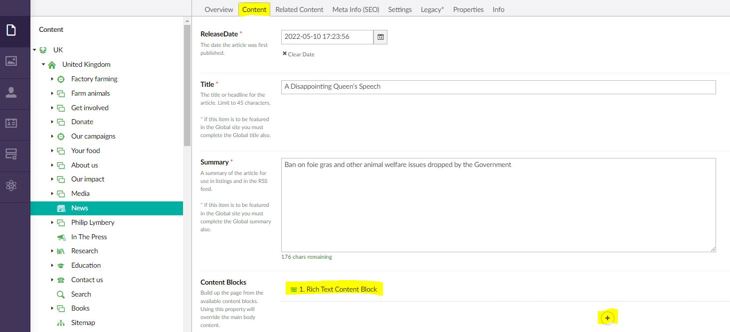
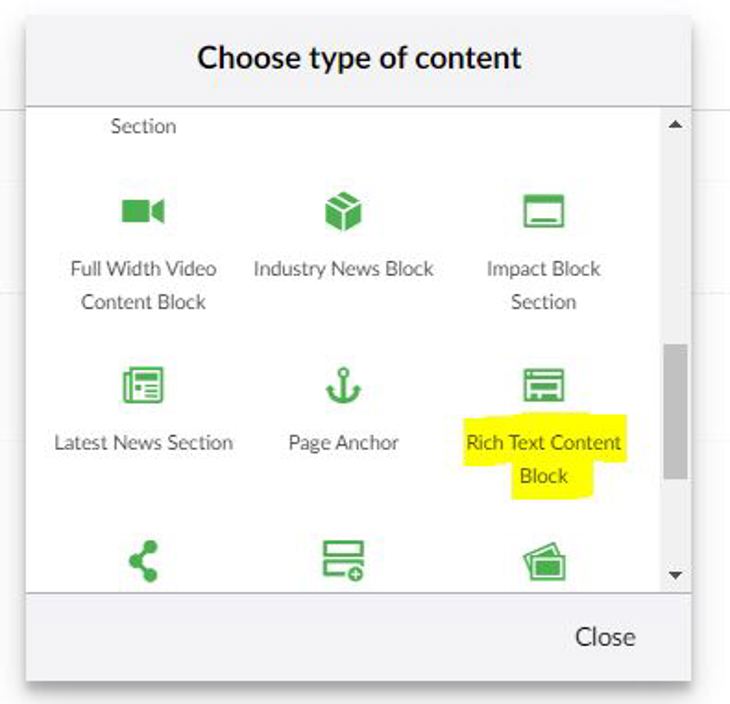
Scroll down and select Rich Text Content Block
It's helpful to the Digital Team if you create a Back Office Title e.g. Webnews + Title

Select the body copy from the briefing document, then copy and paste as plain text in the Rich Text Content block.
- Once inserted, change all headings to Heading 2 using the Formats menu option from the toolbar.
- Ensure headings are written in sentence case and don't have additional styles applied such as bold/italics.
- Check spacing between paragraphs. Return once from the end of paragraphs for correct spacing.
- (Optional) For quotes – style by Format menu using Block Quote. Then the source, ie the the person who said the statement, should be on a new line, and highlighted and select Quote Source ‘P’ from the Format menu.
- NB: This editor is NOT a WYSIWYG style editor. Styling is applied by CSS on publishing and viewing in the browser.
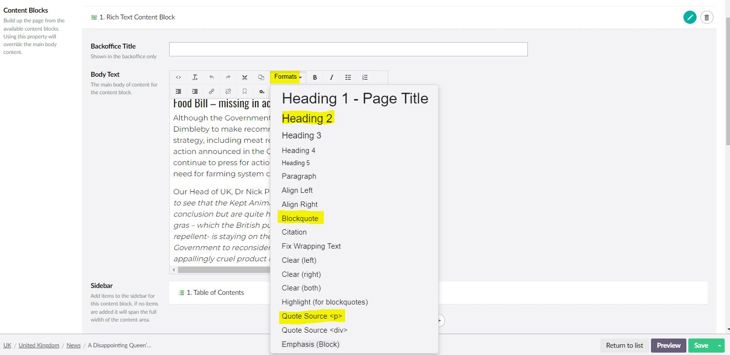
Insert an image (or video)
Put the cursor where you want the image (or video) to appear i.e. at the top of the page before the text. Place the cursor further down the page if you want to include more than one image.
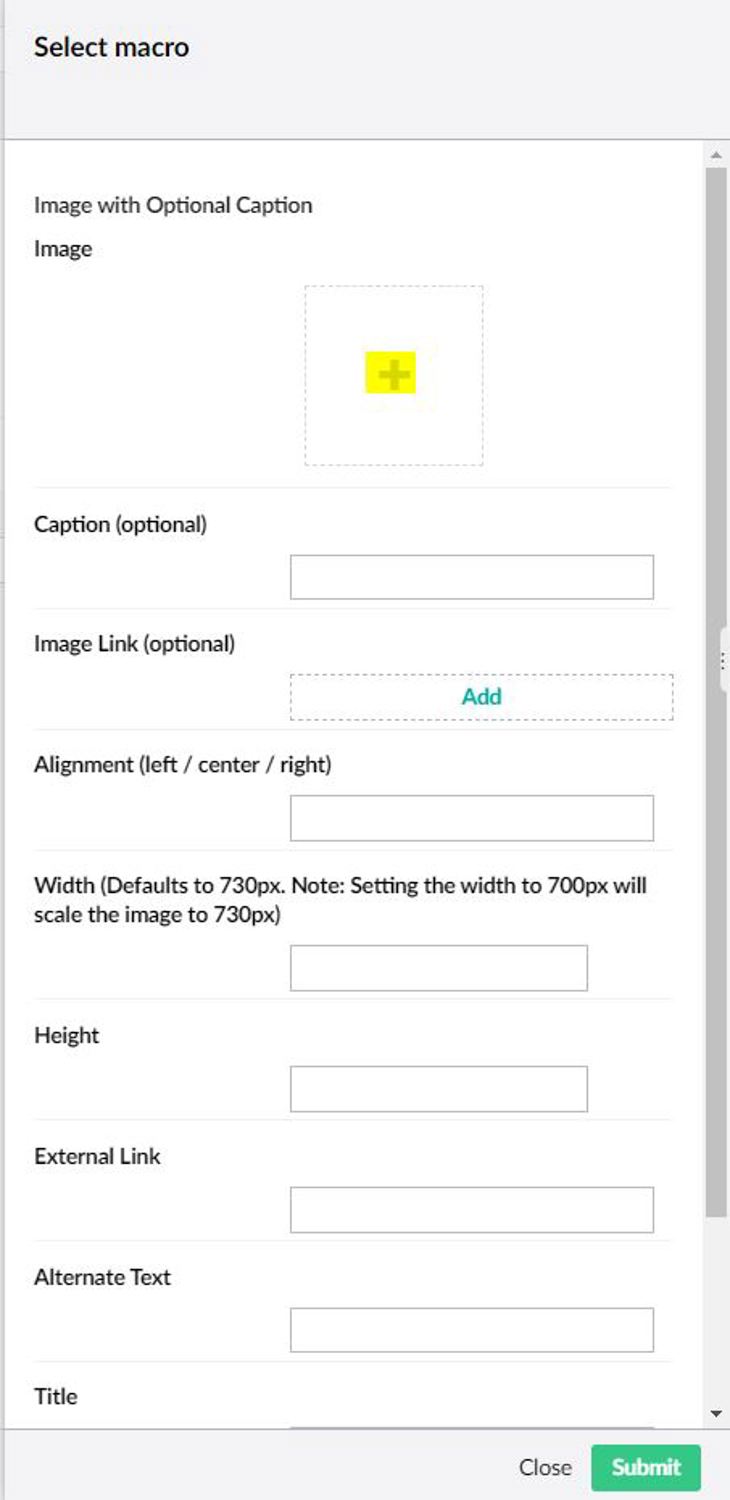
Click 'Insert Macro'
Click 'Insert image with optional caption'
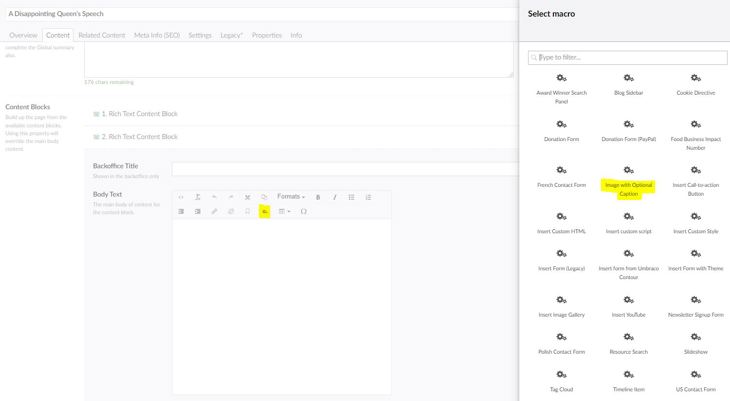
Click on the + sign
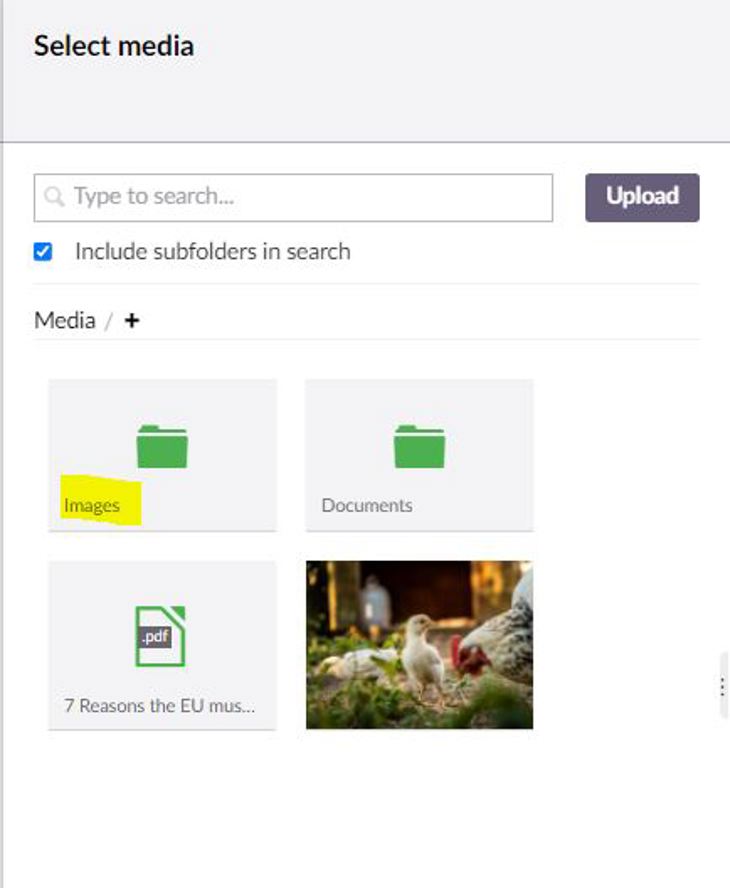
Click on Images folder hover only over the purple box bit.
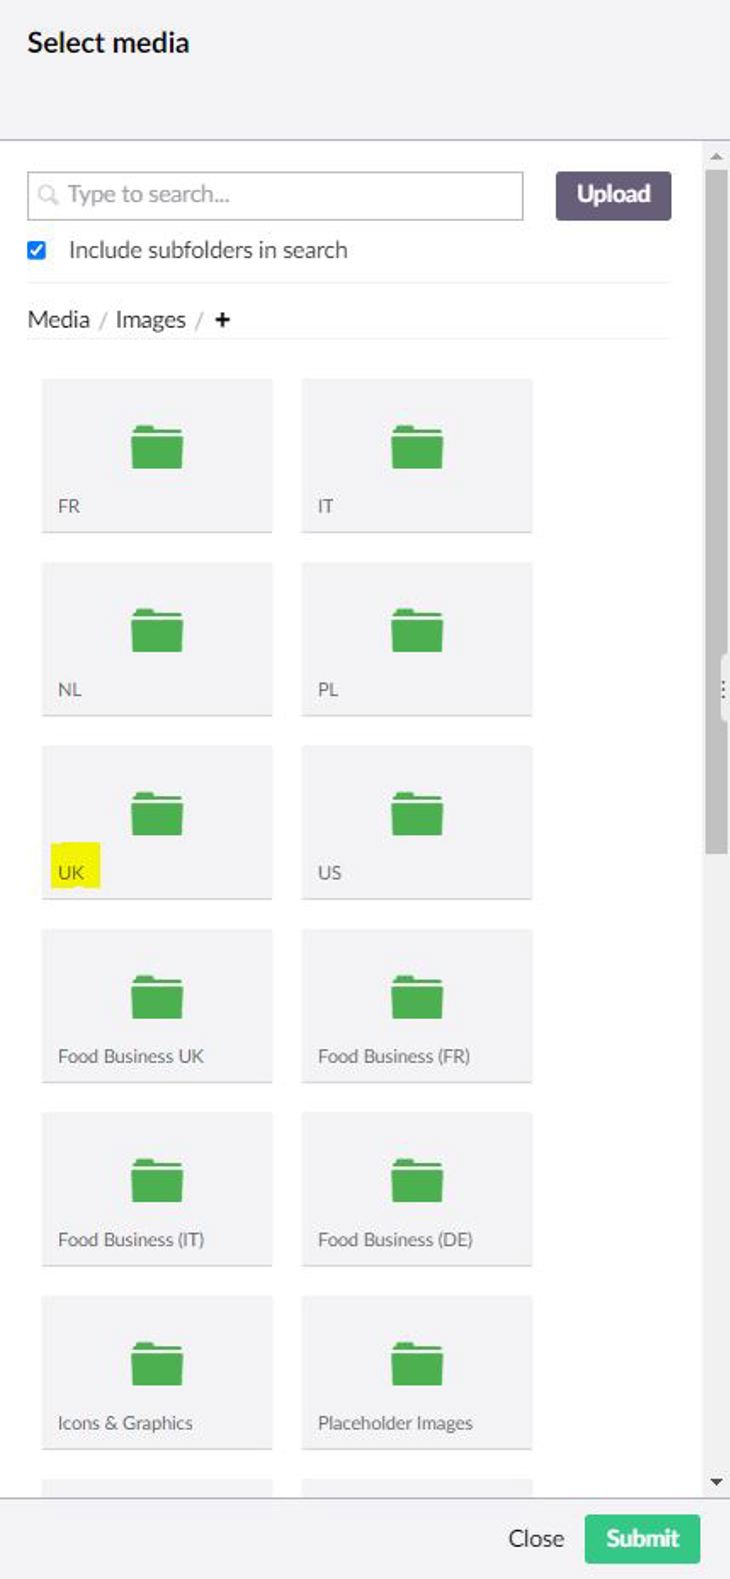
Select the country folder (e.g. scroll down to UK) hover over the purple box.
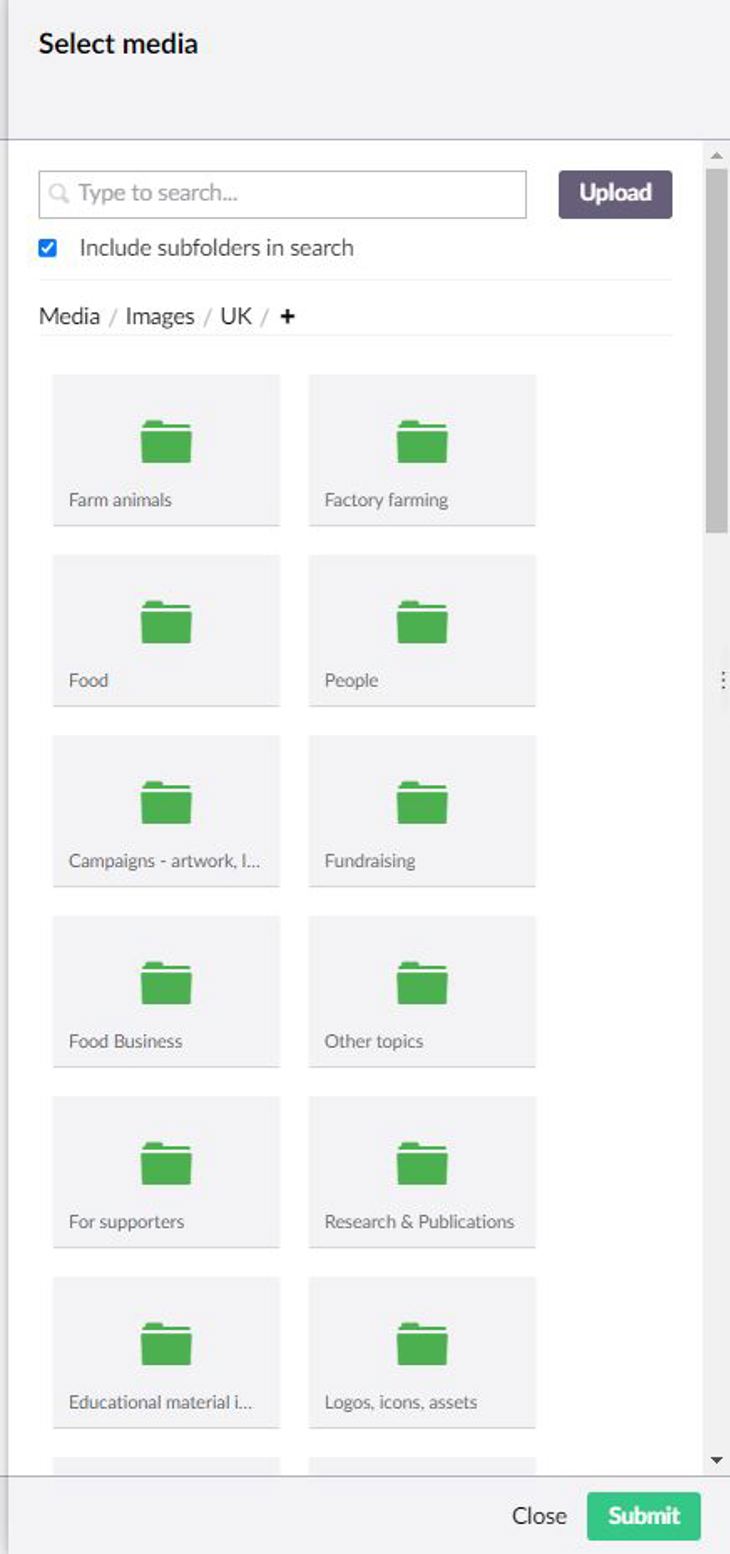
Select the folder where your image is. Hover over purple box.
Select your image. Click on submit
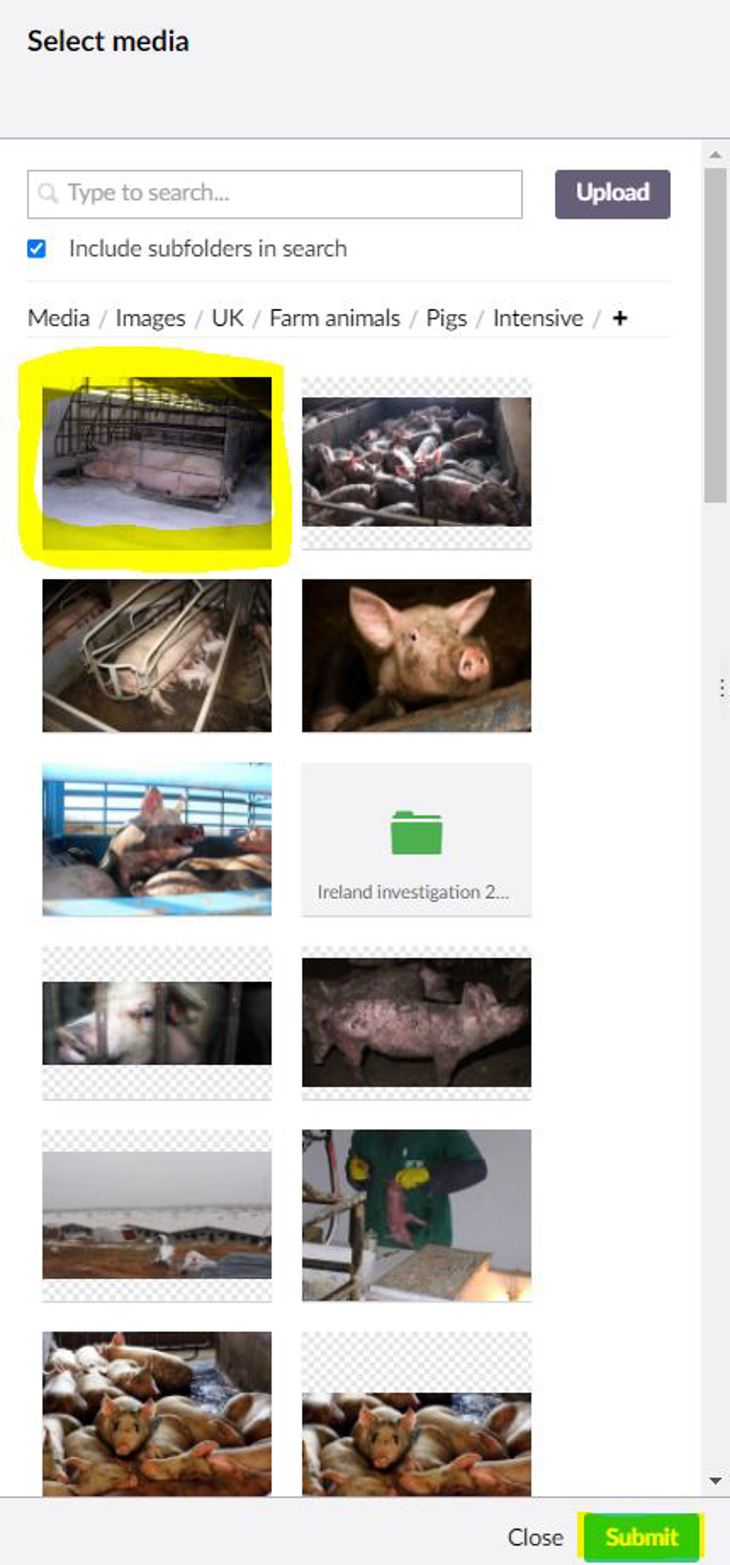
Add a caption (optional) or any other info below (optional). If a photo credit needs to be included e.g. freelance photographers Stock libraries or investigators, use the Caption Function. Click Submit.
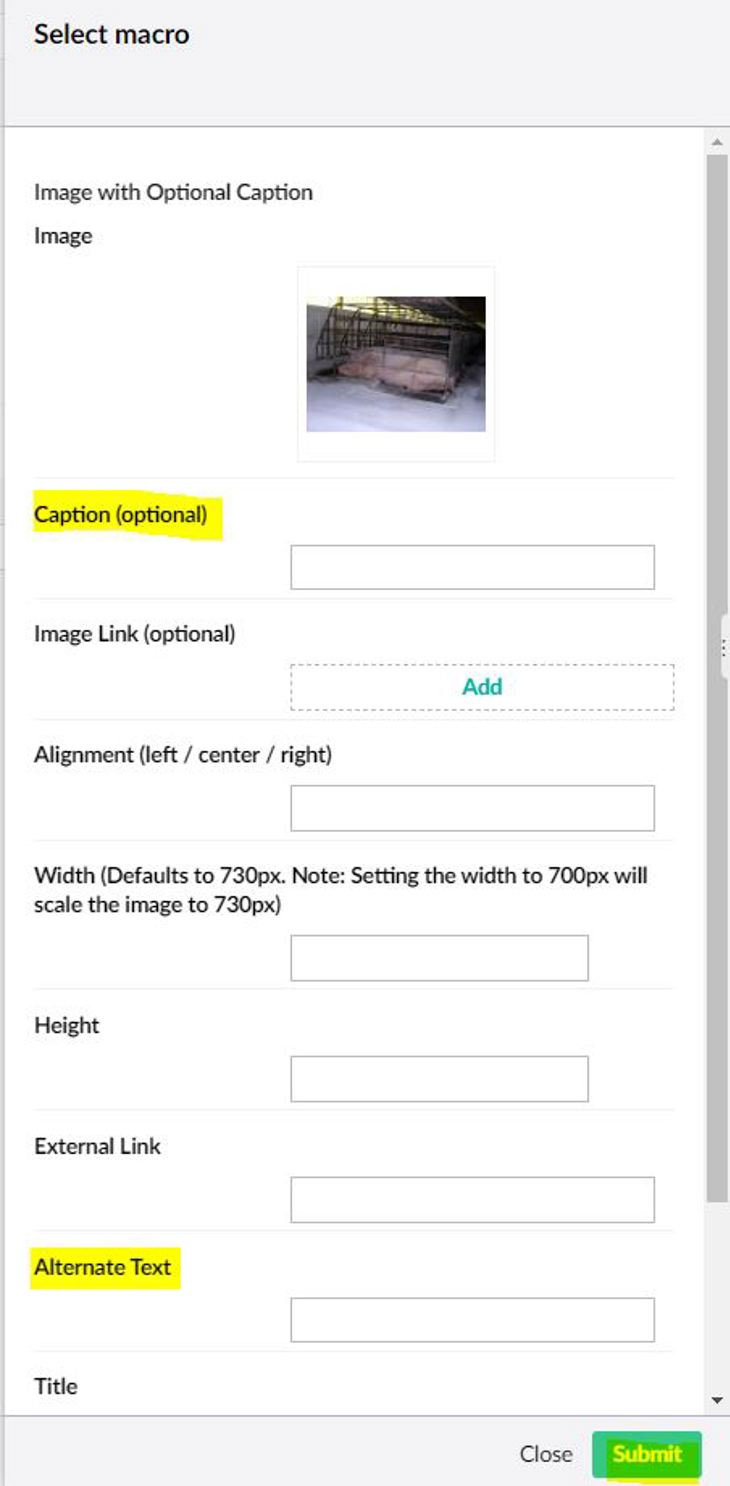
Add alternative text to macro images. Alternative text should be a short sentence that describes the image, so if a person could not couldn’t see it they would still know what it was about. Images must have alt tag descriptions applied. They should be within 125 characters and describe the who, what and where of the image.
- Poor description: “Pigs”
- Good description: “Group of happy pigs in a muddy field”
Alt tags should also contain any wording which is on the image (which should be minimal). This is important for accessibility.
Insert Video
Use the Macro function from the toolbar, select Insert YouTube. The video must be uploaded to YouTube in advance and be publically available to display on the page. Insert the video ID only in the first field. This will be a random mix of letters and numbers after the last forward slash on the end of the YouTube video url.
The video title and other information will automatically pull in from YouTube so preview the content first. You can add additional titles, descriptions and warnings to the menu fields if desired.
Insert Sidebar
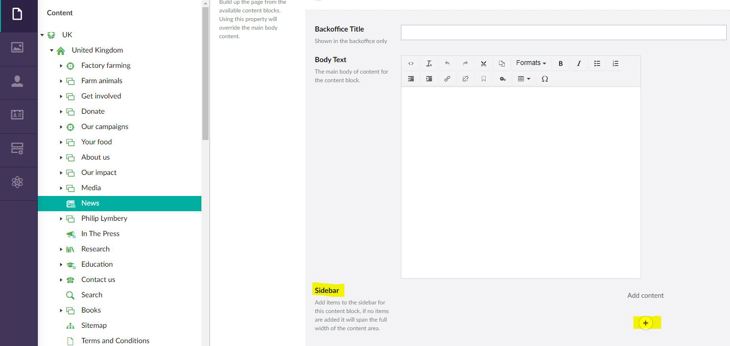
Scroll down the page to Sidebar and click on the plus icon.
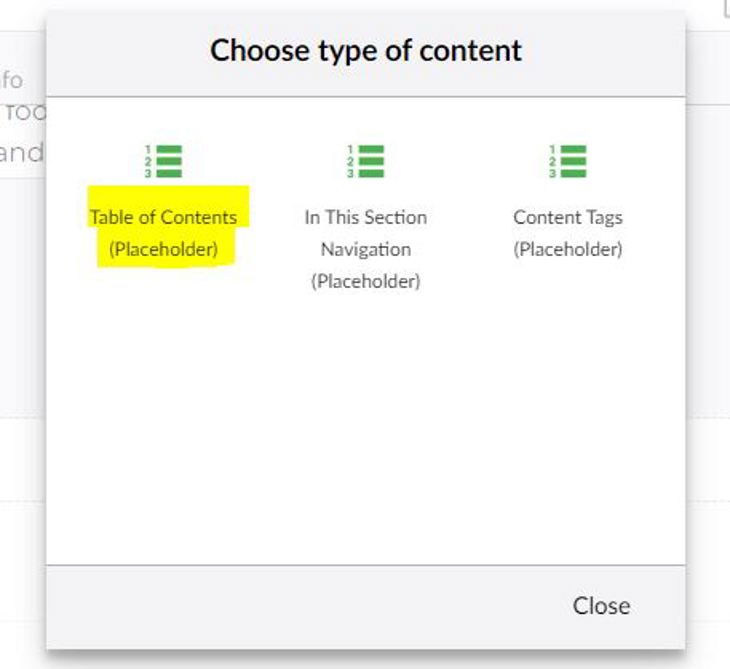
Select Table of Contents. Click Close and then Submit.
A sidebar will only display when there are one or more H2 subheadings present throughout the content. H2 subheadings are what create the listing anchor points. If no H2 subheadings are present there will be white space where the sidebar should be generating. Do not add a sidebar for short articles or where there are no H2 headings present.
Creating links
Highlight the copy requiring a link and then click on the 'link' icon'.
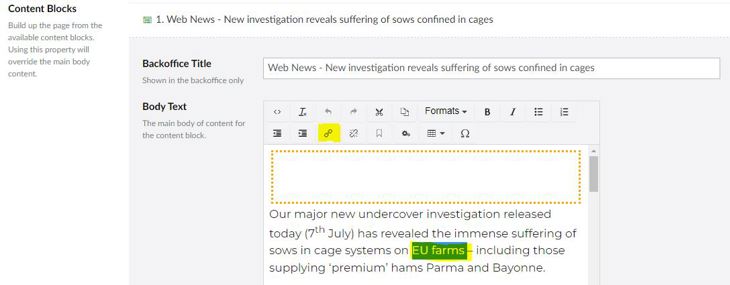
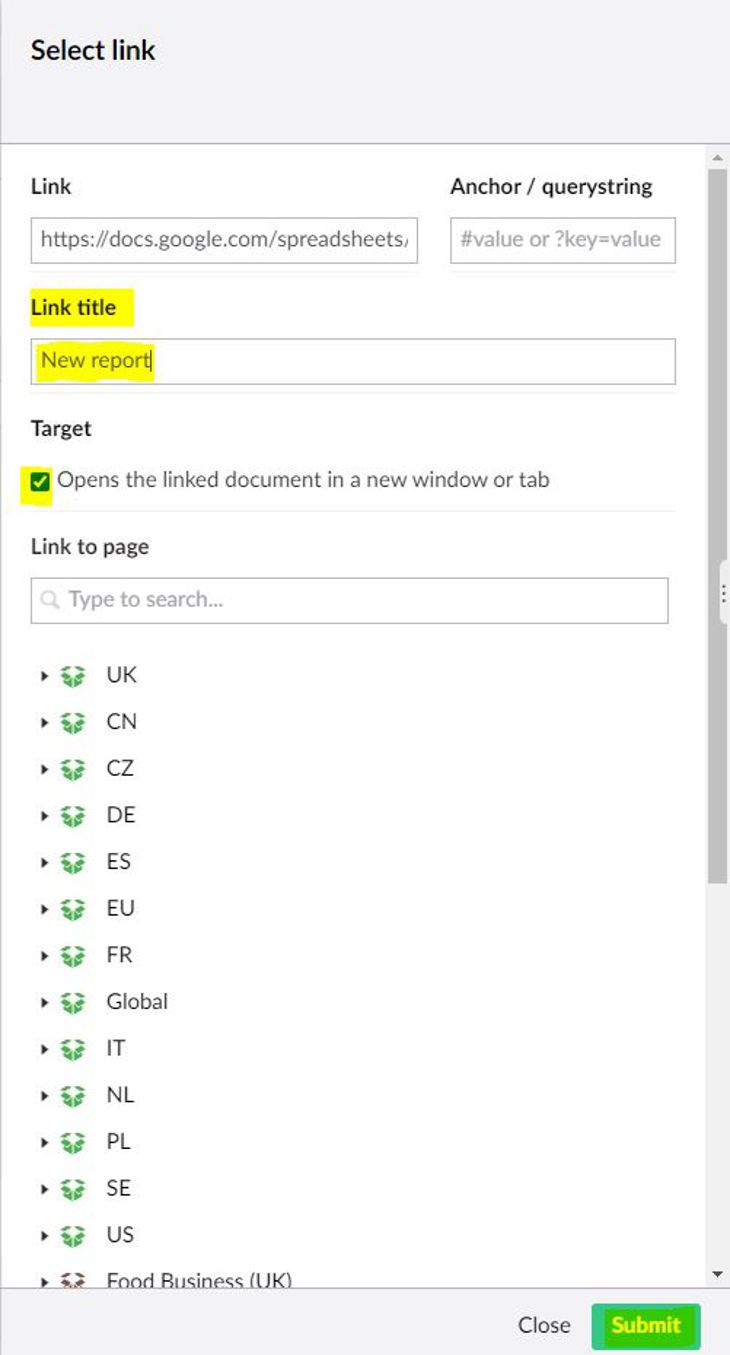
- Copy and paste the link title into ‘Link Title’. This will not be necessarily the same as the text you are highlighting. Eg. If you were linking to a letter signed by 40 people, you might highlight ’40 people signed’ but the title might be ‘Open letter to Boris Johnson.’
- Click on Target so that the User opens the link with a new tab if linking to an external site, PDF document or a ciwf website page of a different site. If linking to another page within the same site you don't need to tick the target box.
- Click Submit
If you require any additional links - repeat the above. NB. If you're not happy with a link, do not try to go back and amend but instead click on the 'remove link' icon and start again.
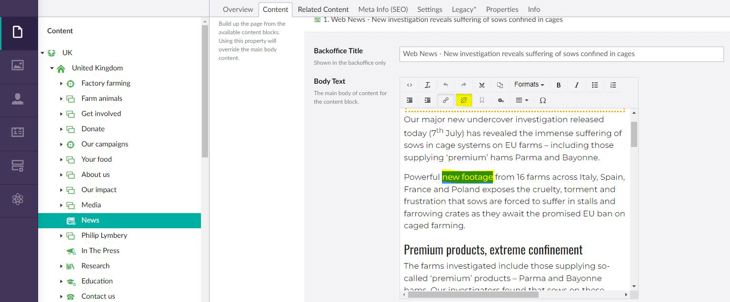
- When you link to internal pages, i.e. other Umbraco pages, please use the "Link to Page" option and find the correct page in the site tree. If it's a page within another office's site, you can tick the Target box to make it open in a new tab otherwise leave it unticked. Always add a link Title. This will be auto-generated when you link to a page through the site tree but always check the link title is a good description of what it's linking to.
- When linking to an internal PDF document uploaded to Umbraco – use the Select Media button at the bottom of the link menu. Only put URL’s in the link field if linking to external sites/docs or EN pages. Tick the target box and check the link title is descriptive of the destination.
- Links to Action/Donation pages (Engaging Networks pages) with exception of footer donation panels which are hardcoded, links should have the correct tracking formula applied. An example of how a tracked link should look: https://action.ciwf.org.uk/page/100367/action/1?ea.tracking.id=ciwf-homepage&supporter.appealCode=CATWE_UK0322. When linking to one of our EN pages (Petition, Email To Target or Donation page), ensure the link follows this formula. Contact the digital campaigner or fundraiser for a tracked link or the Digital Team for help.
Preview your work (This sometimes doesn’t work though!)
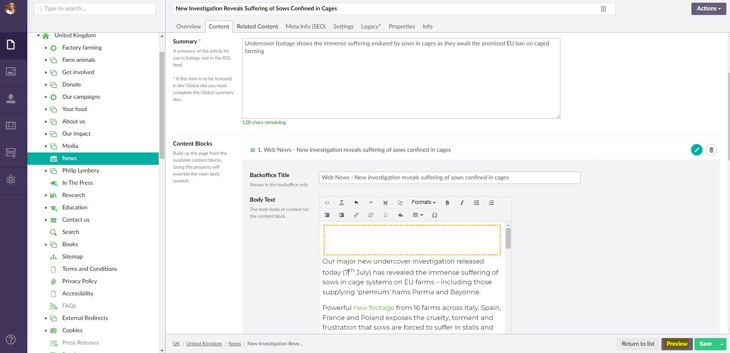
Check and review
- Images are displayed correctly
- Links are all working and opening at the right place
- Each link has a title
- Make sure external links and PDF links open as a new tab
- Do not use hyperlinks on words like ‘here’ but use copy from text instead eg ‘our Food Business work’ instead of ‘Read more about our Food Business work here.’
- There are no gaps in the copy where bullet points are used. When creating lists, make sure to use the bullet or ordered list function from the editor tool tray. Once pasted as plain text, you may need to remove the word doc bullet that gets carried over. It appears as a small dot. Make sure there is only one return between paras.
- Headings are formatted correctly, including side bar. Paste as plain text from templates to avoid problems with bold headings. Alternatively, remove bold from headings before pasting and editing in Umbraco.
- Copy all reads well and there are no typos
- Quotes to be in BlockQuote and the Source should use Quote Source Quote Source p
- Please refer to the Umbraco page checklist for further info if necessary. How to use Umbraco & content block examples
- Please ensure accessibility elements are applied for our impaired readers, for our credibility with search engines and ultimately how our pages are ranked in search engine results. So if you want your pages to be readable by everyone and found in the first place, please use the recommendations detailed in the guide. Thank you.
- If you are happy, Save and Send for Approval (yay!)
- Follow up with an email to notify the person authorised to publish, if you’re not.
- Also note: the order of submit buttons on Umbraco has changed. It will now look like this. To access save and publish you will need to click the little arrow on the green button.
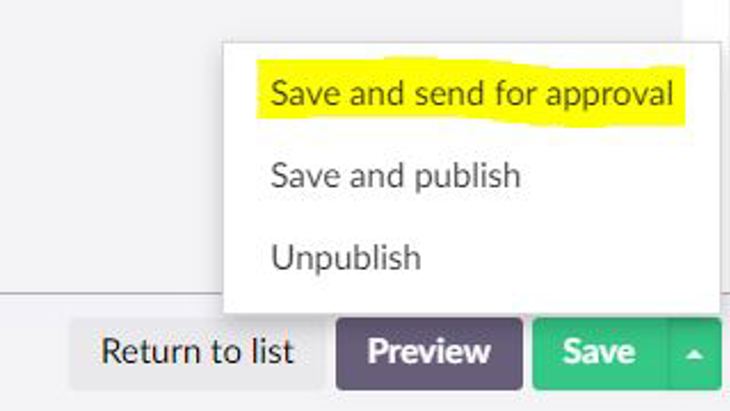
The main reason for this change is to encourage the saving and previewing of pages until happy with the changes and then publishing the changes. Repeated clicks of the publish button have caused issues with servers going out of sync in the past.
Publishing should be done only when you are happy with your changes, and if you do need to publish more than once please leave at least a few minutes in between, especially if you are working on a content-heavy page.
Adding Anchor and Reference Links
Anchor Links
Adding an anchor link to take a user to a specified point on a page is very simple.
- Place the cursor at the beginning of a sentence or header where the anchor point is desired.
- Click the Anchor tool icon from the tool bar.
- Add an id name to the field in the pop-up menu. The name of the anchor can be anything. eg takeaction
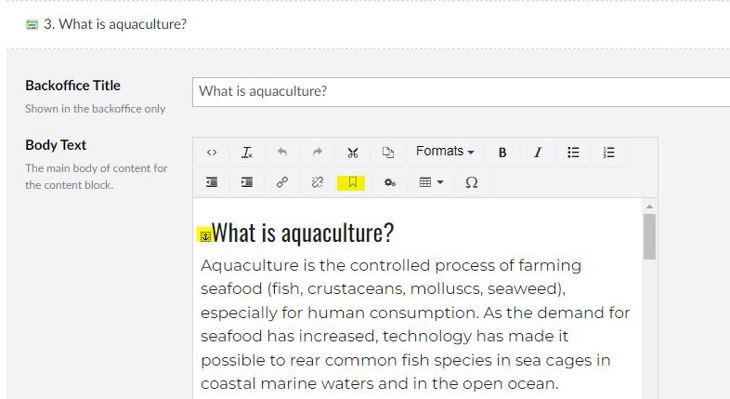
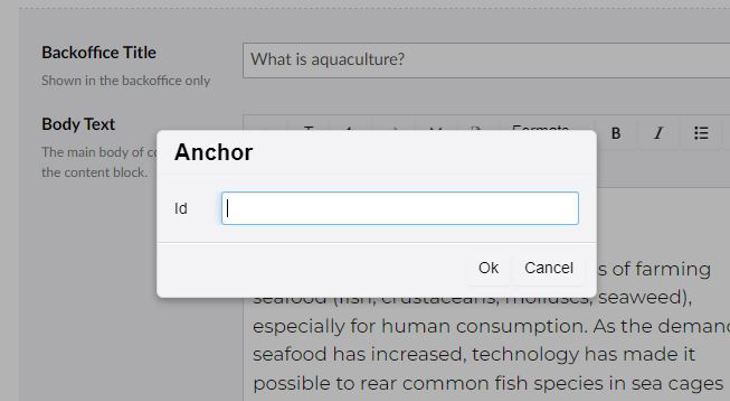
- Highlight the text that you want to be the hyperlink that will take the user to the anchor point.
- Select the Link creation icon in the toolbar.
- Add the anchor name to the Anchor/Querystring field with # in front of it. For example: #takeaction. The names in the anchor id field and the name after the # on the hyperlink must match EXACTLY and is case sensitive.
Creating Reference Links
This is an example page that uses reference links.
To add a reference point where you have clickable numbers or letters at various points in the copy that link to a reference section at the bottom of the page, take the following steps.
- Click on the Source Code icon in the toolbar (top left)
- Click the cursor at the point you want to add the reference link in the html.
- Add: <sup>1</sup> The number here is an example it could also be a letter if you wanted.
- Click OK to accept your HTML entry
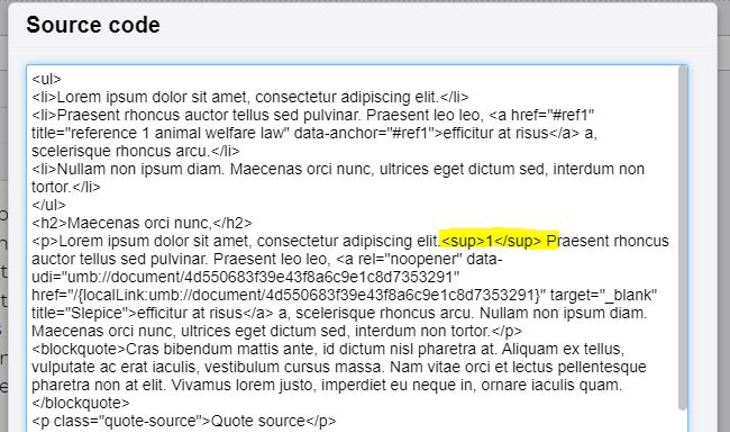
The copy in the editor will now look like this:
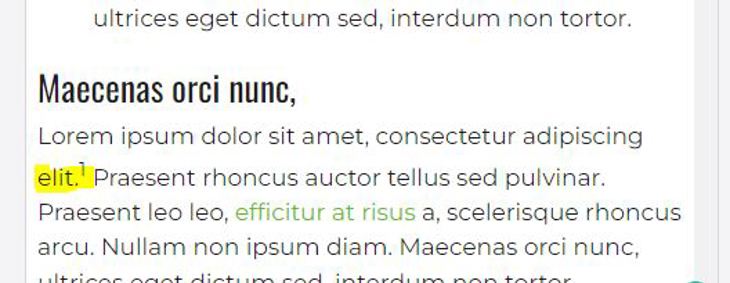
Now you are ready to add the anchor point to the number.
- Highlight the reference number
- Follow the steps above for adding an anchor point.

